Showing posts with label closet. Show all posts

Thursday, March 14, 2013

Loving Stylebook

I have discovered an amazing app for organizing your wardrobe and planning outfits. It's called Stylebook! I think it's only available on the iPhone right now, but that works for me!


It has a closet section where you add photos of all your clothes. Don't they look so cute all little and organized!?


  Then you can make them into outfits...


...and put them on your calendar!
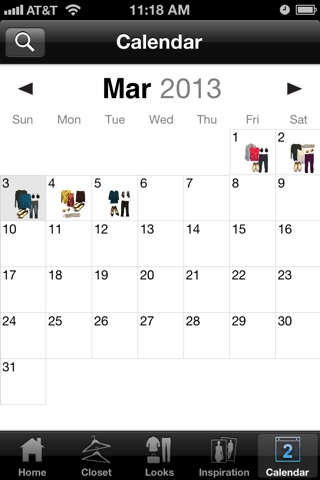

I think this app is amazing for several reasons.

1. It should help me have more variety in my outfits and not wear the same shirt every Friday. Or even worse... wear the same outfit on Friday and the following Monday!

2. It helps me think of more ways to mix and match what I already have to create more outfits because it is easier to see your clothes in this format than smashed together in a closet. You can pick out a shirt and then scroll through and see all your cardigans to see what matches. I totally get stuck in the rut of wearing the same things together when I could do a lot more mixing and matching.

3. Do you ever buy a cute skirt and then realize none of your shirts match it? Or buy a turquoise shirt and realize once you get home that half your wardrobe is turquoise now? Guilty! But with this app, I can see how a potential purchase could work with my wardrobe before I buy it! It also makes it easy to see that I have way too many t-shirts but not enough blouses so that I know what to shop for.

4. It makes getting dressed in the morning so much faster! Which is great for a night owl like me who moves like molasses in the morning.

5. It tracks how often you wear each item. Which will make cleaning out my closet a piece of cake. I can just look in my app and get rid of anything I haven't worn in the past year. And less unnecessary stuff in the closet = less time spent managing it!

6. It also can track cost per wear if you put in the amount you paid for an item. Those $200 boots you splurged on don't seem so bad when you realize you have worn them so much that it's only $1 per wear. I think it will also help me to see which things I wear the most so that I know what types of clothes it makes sense to spend a little extra to get better quality on like my black pumps.

I have about 95% of my clothes photographed and added to my stylebook now and about 2% of my jewelry. I guess I need to get on that.

I am so happy to have an app to keep my wardrobe organized! You have no idea how happy this makes the organizer in me. So happy that while I was sick in bed with the flu and discovered it, I totally snuck out of bed to add the first few pictures of my clothes so I could start playing with it. Yes, it made me feel worse but it was worth it! Ha ha.

Note: This is not a sponsored post. I just really like this app!

Sunday, July 8, 2012

Update and ideas

Since we decided to renew our lease one more year and our little one is becoming more mobile, our organizing/blogging pace has definitely slowed. We did tackle our master bathroom (post coming soon-ish) and make a little progress in the kitchen and guest bedroom during June.

Since our decision to renew our lease means we will have a 2-year old while still in this apartment (how is he almost one?!), we now have plans to do a major switch around to give our little dude his own room!

In the mean time, here are some of my favorite organization ideas I have come across recently.

 1) A DIY shower caddy using a second shower curtain rod. I love that you can customize with how ever many baskets you need. You could also use a second rod like this for hanging pool towels or clothes to drip dry over the tub.

If you know where this photo came from, please share! I found it on Pinterest with a dead link. :(


2) A Thousand Words blog,  has a great system for organizing photos.


3) 2 Little Hooligans has this clever idea for corralling gift wrapping supplies using a stool.


Do you have any great organization ideas you have discovered recently?

Tuesday, April 24, 2012

Regift(bag)ing

I love saving gift bags to reuse them. Those guys are expensive for being nothing but a little paper and ribbon! The only problem was that my gift bag collection was taking over our guest closet and it was getting hard to quickly find what I needed. Plus, some of them were getting scrunched. So, as I grabbed a bag to wrap a baby gift, I decided to organize them all!

First, I sorted all my gift bags and threw away all of the crunched up old ones. The next step was deciding what to store them in. I didn't want to spend any money on it right now, so I went into my laundry room to grab a couple of paper grocery bags. Instead, I discovered a couple of white bags from Loft! I got really excited because they are much prettier looking! Everything fit perfectly in the bags, but I was one short. Luckily, I found a Bed Bath and Beyond gift bag that was similar. Here are the sorted and filled up bags.


I used a sharpie to label what was in each one. One holds tissue paper, gift boxes, ribbon, bows, and gift tags. The next one holds gift bags for holidays, weddings, and baby showers. The last one holds my non-specific gift bags. I labeled it miscellaneous.


The final step was putting them up on the shelf and hoping they fit... I had just enough space for them! I love it when things work out so easily like this! I hope the rest of the closet is this easy to organize (yeah right)!


As for how I store rolls of wrapping paper, I don't have very many so they are in the flimsy clear plastic box that a 4 pack I bought at Target one year came in. It stands up vertically on the floor of the closet.


How do you store your gift wrapping supplies? Do you like to reuse gift bags and tissue paper or buy new?


Thursday, March 1, 2012

Closet clean out, part 2

As I mentioned yesterday, we finished cleaning out or closet! Man, it feels good seeing that crossed off my list.

February
Master bedroom
Master closet

In this first picture, you can see how my clothes are organized now. I have my shoe shelves, skirts, pants, and dresses hanging in the back since that is the only floor length hanging space. The top bar on the right is where I hang my shirts, sorted by sleeve length. On the very far left, I have a few shirts that are a little too small but should fit (and I will want to wear) when I lose the rest of my baby weight. I even made a little divider to separate those from the clothes that fit me now but cutting a slit in an index card and writing on it.

Below my clothes, I have a my "dresser" which consists of three plastic drawers. The top one holds bras and undies, the middle one holds pjs, and the bottom one holds socks, tights, and workout clothes. I got rid of a ton of clothes, as you saw in closet clean out, part 1. This even included perfectly good socks because I have way more than I wear. I used to think unless something was broken/worn out/completely out of style I should keep it. But now I'm realizing there is no reason to keep perfectly good clothes and items if I never use them. They just take up space and cause stress!

The shelf in the back of the closet holds my scrapbooks, sewing supplies, and pants I will wear again after I lose a little more baby weight. On the floor way back in the right corner, there is a ton of space but it is hard to get to because of the clothes hanging up. I currently have a big clear plastic storage bin back there where I have started to store keepsake items so they are all in once place. It works well since I don't need to access it very often.


Here you can see my shoe shelves better. My flip flops and slippers are in the pockets on the side of the shelves. The only shoes not on my shelves are my tennis shoes and three pairs of boots. I even have an empty shelf, begging for new shoes! I tried out at tip I read about recently for keeping my boots from flopping over by rolling up magazines and tucking them inside. It works extremely well!


I consolidated and better organized the stuff on the top shelf of our closet too. There is even some extra room now! I stacked up shorter boxes, and filled the yaffa block with bags so that they aren't spread out across the shelf. Less used items are up here since it is difficult to reach without a step stool.


I moved my scarves, belts, and purses to hangers on the wall which gave me more shelf and hanging space. The scarves and belts are hanging from a tie holder. The bags are hanging from my Handy Hold All that I mentioned in my post about the gift of organization.


Here you can see some of my husband's organized clothes closer to the front of the closet. He has even more hanging above these, but I've learned it is quite difficult to take pictures inside a narrow closet! I love having his clothes in the closet instead of piles on the bedroom floor! This is my motivation to keep up with his laundry.


At the very front right section of the closet, my husband has his "dresser" made from silver shelves and Martha Stewart fabric bins. He wouldn't let me label them, even though I asked nicely. If they were mine they would totally have cute labels. Some day, when we have our own bedroom and a real dresser, these can be used for toy storage!


Here's the entire closet! Cleaning it out taught me that big closets might not be as good as I once thought... they just accumulate more stuff! In this shot you can see my hamper in the back. My husband uses a laundry basket in front of his dresser as his hamper. I also had room to put our box fan and a smaller oscillating fan in the closet instead of on the bedroom floor.


Here's the before photo again for comparison. Yay, floor!


The difference is even bigger than what these photos can capture when it comes to functionality! Half of our clothes weren't even in the closet in these before pictures. Do you keep your closet organized or does it need some work?

We are a little behind schedule on the bedroom, but is about 80% finished and the plan is to make it 100% finished this weekend so we can start on March's space.

Wednesday, February 29, 2012

Closet clean out, part 1

We are almost finished with our goals for February! There are just a couple of small areas in the bedroom left to tackle.

February
Master bedroom
Master closet

The closet project wound up taking a lot longer than I expected! To start things off, here are the before photos. Notice the leaning hamper and laundry basket precariously perched on top of a yaffa block.


See the bags spread out across the top shelf, taking up more room than they should.


And look at the floor... yikes! I think it's down there somewhere.


I started off by catching up on laundry. I think it involved at least 10 loads. But I am proud to say I am caught up. Everything is washed and put away other than the clothes we wore the last couple of days. YAY! Now, if I do just 2-3 loads per week I should be able to keep up with it.

After that, I went through my shoes. I realized I have mostly been wearing the same four or so pairs and haven't worn many of them in years. The shoes I do wear kept getting left out because they didn't fit in the closet. It was time to let a lot of them go. *tear* I had 16 pairs that went in Goodwill bags, and four that went to the dumpster. I loved those four pairs of shoes to death...literally! I had already had the silver and black heels repaired once, and the two pairs of flats were worn beyond repair. If only they made purple and gold shoe polish... I decided that it was time to let them go, but took this picture to remember my old friends shoes. This has definitely been the most emotional part of the de-cluttering process so far! See how cute they are? Too bad they no longer are comfortable and barely have soles.


The next step was going through all of my clothes and getting rid of things I know I won't wear again. It involved trying on lots of things to see how they fit my post-baby body. I am still in the process of losing baby weight, but there were a lot of things I knew I wouldn't wear again. I wound up with seven bags of shoes and clothes, plus a few bags, to take to Goodwill!


I also filled up an entire laundry basket with extra hangers! I'm going to see if Goodwill or anyone else wants them so I don't have to throw them all out. I decided to stick with the hangers that don't have the twisty hook part because they don't get all tangled up the way these do. For the most part my husband's are black and mine are white.


Stay tuned for the after photos, coming soon to a blog near you! By the way, do you want some extra hangers? Do you have an emotional attachment to your old shoes and clothes?

Monday, February 20, 2012

Twinkle twinkle little jewels

Over the weekend I tackled the bedroom and closet project of organizing my jewelry!

Here is the before picture of the jewelry I keep in the closet. This is the first thing you see when you open the closet door. The magnetic/bulletin board with hooks is perfect for hanging larger necklaces and bracelets. The necklaces hang from the hooks, and the bracelets hang from push pins on the cork board part.


A few random items including a lei, tags from clothes, and apron were hanging on it, so I threw them away or put them back where they belong. I also moved the necklaces around to be in a more convenient order. Plus, I hung up the necklaces and bracelets that had been left on the bookshelf and in other rooms. It's not a huge difference, but it definitely makes things a little neater. As a side note, the Arkansas cling is my husband's, not mine. Go Frogs!


The next part was to tackle the craziness on the bookshelf. I told you it was crazy! This shelf is now full of books, but that's a post for another day. On the left you can see we had a bunch of stacked up jewelry boxes, vitamin bottles, and my husband's dresser organizer. On the right we had my jewelry box buried under some random papers, a couple of candles, old perfumes, a tray with more jewelry and odds and ends, and some photos. Since I had a lot of jewelry left out all over the place, it was getting hard to find what I wanted to wear! Stacking things on top of my jewelry box definitely didn't help with putting things away either.


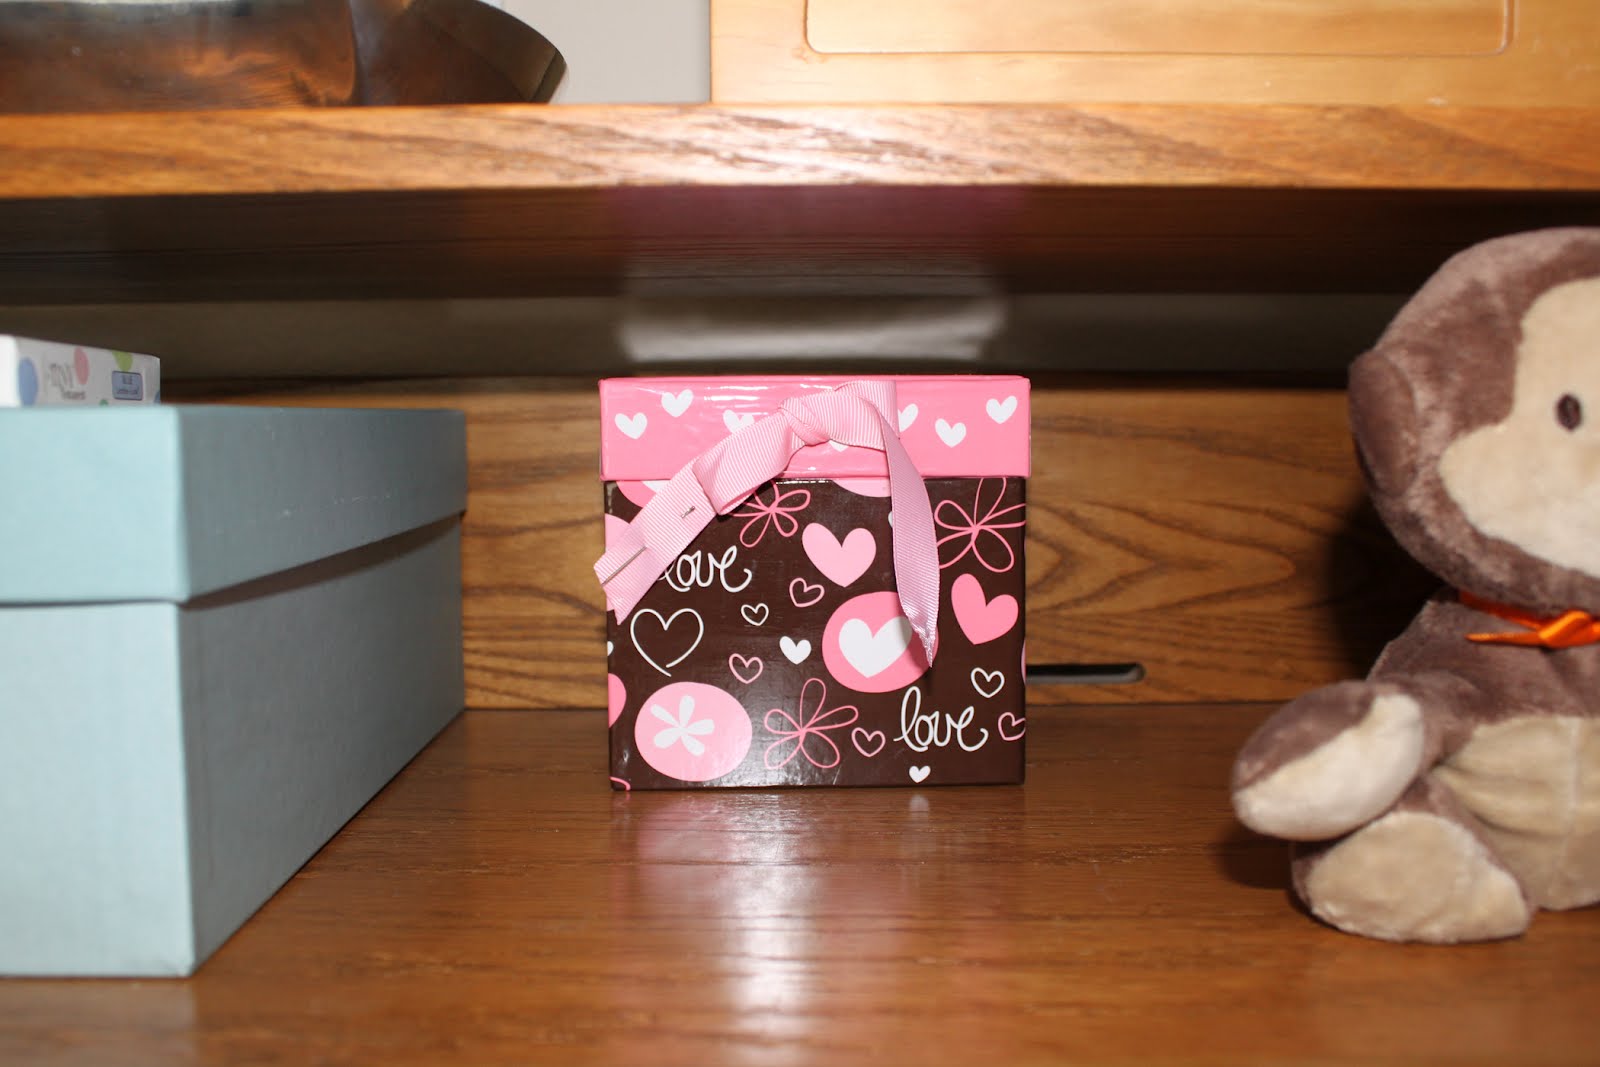
First, I gathered up all my jewelry and laid it out on the bed. Then, I organized it! I decided to take everything out of the cardboard jewelry boxes because it makes it hard to see what I have and takes up a lot more space. Things I wear a lot went in the top tray of my wooden jewelry box. Things I wear a little less went in the bottom of the jewelry box. And things I rarely wear went in the pink and brown box (my yummy red velvet bundt cake I got for Valentine's day this year came in it). As you can see, one of my kitties was fascinated by the process... oooh, shiny stringy things!


The black drawers stayed on the shelf. The vitamins went in the bathroom, while the candles went in a drawer in the guest bedroom with other candles. I threw away all of the perfumes except for one because most of them didn't smell right anymore and I rarely wear perfume. The photos went on a shelf where my photo albums now live. I'll talk more about that in the upcoming post about the bookshelves.

The organized jewelry went on the top of the chest of drawers now that the was room. The box went in the center, and I kept some larger jewelry that I wear a lot in the heart tray. It looks so much prettier when it isn't overflowing.


Here's a close up of the heart tray.


And here's a close up of the jewelry box. I also cleaned out all the dust with a damp cloth while I had it empty. I'm trying to do a better job of keeping it closed now!


And where did the little pink and brown box go? It's behind the white metal basket on the shelf below! So, it's out of sight, but conveniently located. I love how it utilizes the space back there.


So, that's how I organized my jewelry. I probably can get rid of some of the jewelry that I put in the pink and brown box, but I decided that would make such a small impact that it can wait a while. I didn't take a picture of it, but the jewelry inside it is separated into little clear plastic ziploc-type baggies. I found them at Hobby Lobby by the cash register. They help keep all the earrings together and necklaces tangle free.

How do you store your jewelry? Did you organize anything over the weekend?

Sunday, January 22, 2012

Corralling greeting cards

I'm so excited about how I organized my greeting cards that I'm starting with an after photo! I used to save every single greeting card anyone ever gave me. My collection of cards from the past five or six years took up two photo boxes and outgrew them after Caleb was born, so there were just piles of cards on top of the boxes. I had re-read them a total of zero times, so I decided it was time for most of them to go.

I went through them all and made several piles
  • Keep for sentimental reasons
  • Keep to use parts of the design for scrapbooking
  • Keep for design inspiration
  • Keep because I might frame and use as art
  • Trash
I was good and got rid of a lot! I think I kept 1/5 or less. Most of the sentimental ones will stay in one of the photo boxes... more what will happen to the rest in a minute. The ones I might use for scrapbooking will go with my scrapbooking supplies. The design idea ones will go with the rest of my design samples. And the ones I might frame will go with the art file I plan on creating. Not sure how it will look yet, but I need a way to store flat things that aren't currently framed and on my walls. I want to keep all of my wedding cards and baby shower/new baby cards and thought it would be helpful to group them together. So, I made them in to books! Now they are all bound together into cute little keepsakes.


I was originally going to punch holes in the corner and add a binder ring, but once I stacked the cards up I realized there were way too many! So, I just tied a ribbon around them and added tags to label them. Then they went back in a photo box, all pretty and organized.


I am also going to do this with the Christmas cards we get, starting with this year. I hadn't put this year's cards away yet, so they went straight from my card display to into a book. I did use a hole punch and binder ring for these. I also included an envelope in the back for letters and photos we received.
Then I tied them up with some pretty ribbon I had lying around and a tag I cut out of cardstock. They got packed away with Christmas decorations. This way, every year as we are decorating fro Christmas we can look through all the cards we received in years past.
Now it will be so much easier to enjoy special cards and memories without digging through giant stacks.

If you are wondering how I display my Christmas cards, I use the Umbra photofalls desktop. I decided I didn't like using it for photos because it gets so dusty when left out year round and the clips dent photos. But it works perfect when I get it out once a year to hang cards on it!

Here's the project breakdown.
Supplies needed: cards, ribbon, cardstock, binder rings, pen or marker, and hole punch
Total cost: $0 for me since I already had everything (approx. $6 if you need to buy supplies)
Time spent: approx. 3.5 hours (2 hours going through cards and 1.5 hours making the books)

Are you a saver or do you throw cards away? Do you have any creative uses for old cards?

Thursday, January 12, 2012

Unconventional storage

My baby was in the NICU for several weeks after he was born. While he was there, he ate from disposable bottles. When he finally was able to come home and were were getting ready to leave, I realized we hadn't washed our bottles at home yet! And, I was concerned that he might not eat well from them since he was used to a different kind. So, I asked if we could bring home some of the disposable ones to hold us over and wound up with tons of these!


When you take the nipple off, you are left with a cute little container that has a lid that snaps shut. Once we were finished using them as bottles, I realized they would be GREAT storage containers for small things! So, I went in search of things to put in them, and found my craft box. It had all kinds of little baggies with things spilling out of them. Now they are contained in neat, labeled containers.


I also included some empty containers with blank labels in the box to make it easy to add things. I love that now I can open the box and instantly see what is inside instead of taking everything out.


I still have more containers, so I'll keep you posted if I find anything else to store in them during our organization quest.

Another idea I have been thinking about is covering cardboard boxes with fabric, wrapping paper, or even brown craft paper to use for storage on top of our bookshelves in the living room. I have been looking for baskets, but haven't found any that are quite right. I haven't measured yet, but I think that diaper boxes or printer paper boxes would work.

Here are a few creative storage ideas I have found on Pinterest. I would love to try some of these. They definitely inspired me to think outside of the box when it comes to organization.

Using a magazine/paper organizer for saran wrap, foil, etc. — this would be easy to slip in a pantry and free up drawer space

(Image originally from Chica and Jo)

Using CD packages for spools of ribbon — genius!

(Image originally from Grosgain)

Using a rake for necklaces — pretty and functional!

(image originally from Twig Home)

Bins for kitties — kidding with this last one, but since I have three cats this was too funny to not share

(image originally from The Ellen DeGeneres Show)

Have you used any unusual containers for storage in your home?

Unrelated side note: I am very supportive of breastfeeding and wanted to very badly. I worked with an amazing lactation consultant who is now a friend and tried EVERYTHING. Sadly, I was not able to produce enough to nurse my baby exclusively, hence the need for bottles.

Sunday, January 8, 2012

Utilizing closet space

I can cross an item off my de-cluttering list!

January
Living room
Dining room
Hall closet

First, here's a before picture of the hall closet. It's not bad, but I knew it could be better.


I was actually able to add more than what I removed due to just making better use of the space!

First, I took almost everything out. I got rid of a broken umbrella, extra hangers, a coat I haven't worn in over five years, and on old jacket that is too small. I also realized I still have a black pea coat that I thought I had given away and recently was wishing I still had... and it still fits! You've gotta love that new clothes feeling without spending a penny!

I was hoping to fit these games in the closet instead of having them out in the open under an end table since we don't use them very often and they aren't exactly decorative. Plus, before we know it Mr. Baby will be exploring them and putting dice in his mouth if they stay there.


I knew extra shelves would really help. Then I realized I had some in the top of our bedroom closet! I had used them in our old apartment, but there isn't enough vertical hanging space in our current master closet. So they were just lying around, waiting to be used!


Don't worry about my kitty, Sketch, in the above pic, we don't keep him in the closet! He just really dislikes closed doors and wanted to check out the closet while he had the chance. I think he approves.

The shelves fit perfectly next to our coats and jackets and were key to organizing the space. I used one shelf for my scarves, gloves etc., one for my husband's gloves, etc., three for games, and one for miscellaneous items. The umbrella fit perfectly in a side pocket of the shelves. By adding the shelves, I was not only able to add the games, but a cooler and folding chair fit too! I was amazed by how much more fit in what looked like a full closet and how quickly this project went!


Here's the project breakdown.
Total cost: $0 for me (I think the hanging shelves were originally around $15 at Bed Bath & Beyond)
Time spent: 25 minutes

Are you closets neat and organized or stuffed to the brim? Do organized closets matter to you or do you just shut the door?