
Thursday, June 20, 2013
Sunday, April 28, 2013
But He Was Still Hungry....
Now that my baby is 3 months away from TWO, I guess it's about time I
get around to posting his 1st birthday party details! We went with a Very Hungry Caterpillar theme! In case you missed it, I mentioned the
beginning of my planning in this post here.
There is no way I could have pulled this off without planning ahead! Yay for organization!
I designed the invitations myself and had them printed on cardstock at Kinkos. I set them up several on a page and trimmed them out to get the most for my money.

Of course, I had to serve the five main fruits from the book. We got the leaf place mats as a wedding gift and I taped black circles on them to look like the caterpillar ate through them.

I also went nuts making tissue paper confetti. I had a circle whole punch from a college project which I put to good use! My hand hurt for about a day after punching a rainbow of circles. When I had the invitations printed, I also had signs printed which I mounted on foam board and attached to fruit with toothpicks.

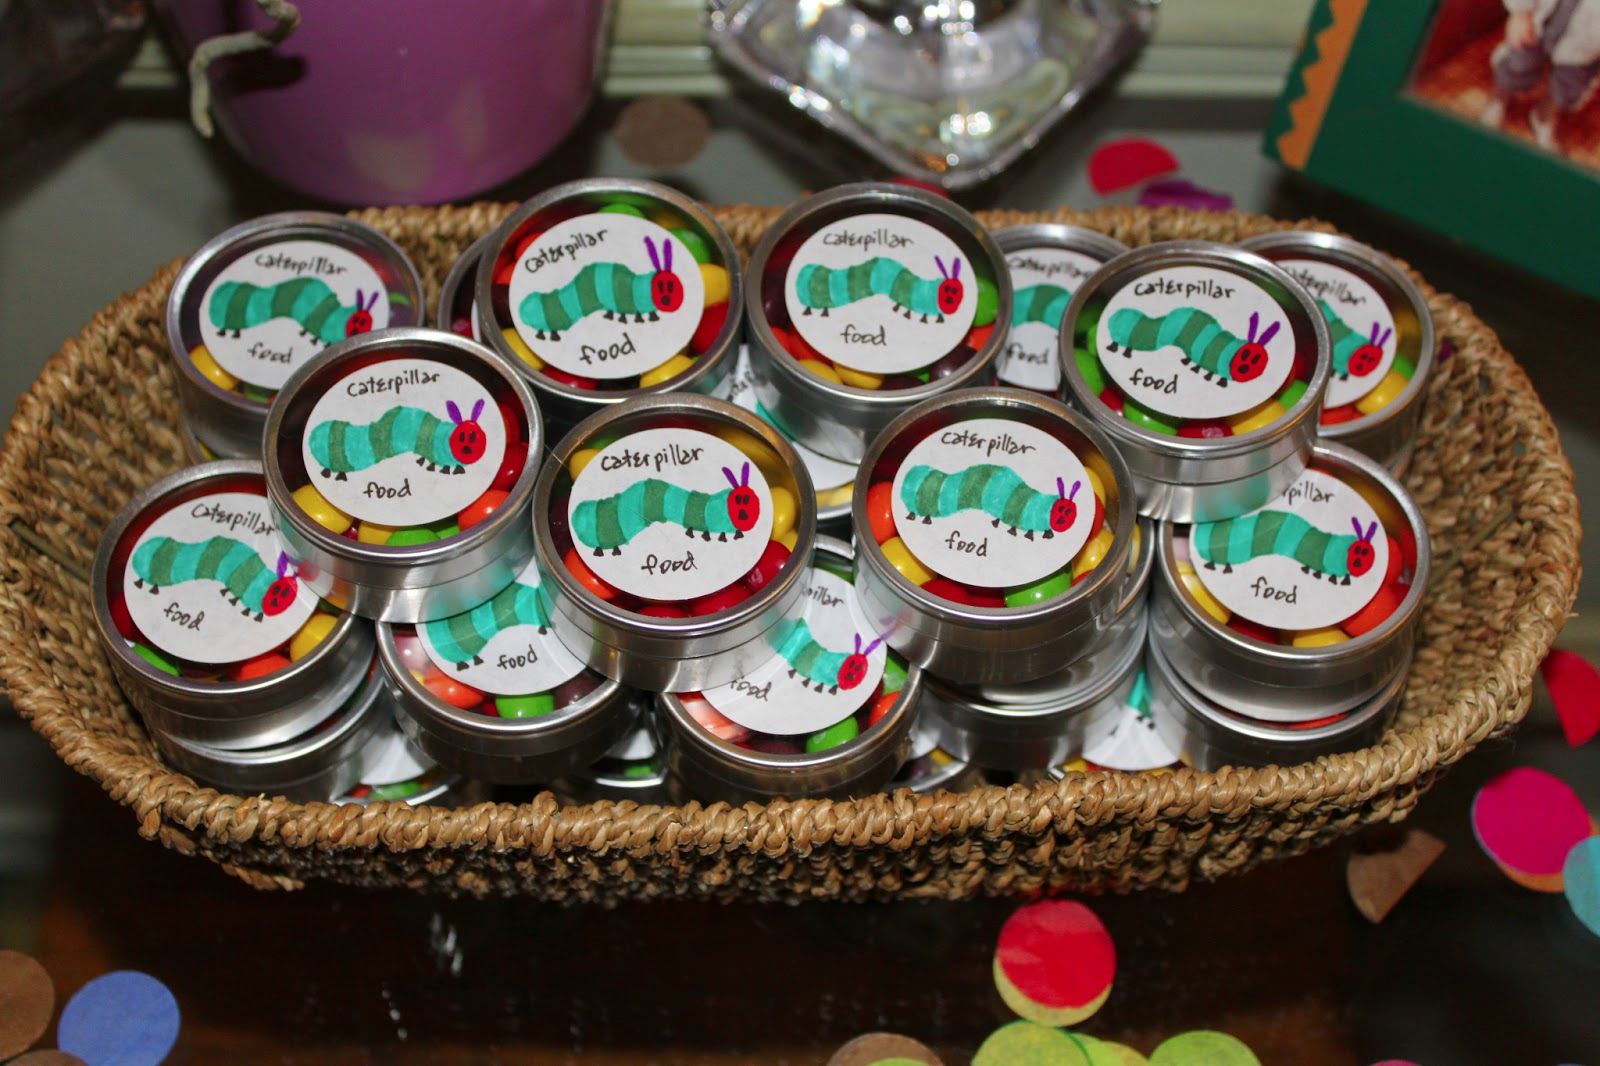
For party favors, I put some leftover wedding favor tins to good use! I never would have come up with this idea if I hadn't been cleaning out my guest closet. I hand drew all the little caterpillars on the labels and filled the tins with caterpillar food (skittles).
I displayed monthly pictures on a giant caterpillar going up the stairs. To make it I traced a kitchen plate onto construction paper for perfect circles.

Here's the caterpillar in it's entirety!

I looked EVERYWHERE to find the giant lollipops for the centerpiece I made. Aaaand, I can't remember where it was that I finally found them! I'll update when I think of it. I just re-wrapped them with clear plastic and taped construction paper number 1s to them. Then I stuck them in a plastic bucket. To weight it down I used pennies topped with shiny blue stones (also left over from our wedding and found during the closet clean out).

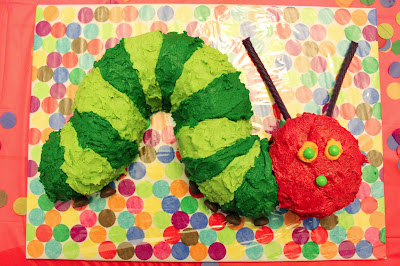
And since you can't have a party without cake, with the help of my talented sister-in-law and mom we made this beauty out of a bundt cake and stacked sheet cake for the head! I made the cake board by modge podging some of my tissue paper circles. And I designed the cake. I may or may not have made a paper mock up of how it would fit together. I also may or may not have researched where I could buy Grapevines candy (Tom Thumb) because the antenna HAD to be purple. I think I got a little crazy in my quest for a perfect 1st birthday party. ;) My sister-in-law did an awesome job of baking the cake and making icing. And my mom did an awesome job of frosting it!
Random fact that I didn't realize until after choosing to do a caterpillar cake: apparently multiple family members of mine had caterpillar cakes for their first birthdays! So it's totally a tradition now. :)
Of course, the birthday boy needed his own mini smash cake! Don't ask me why I thought his first experience with icing should involve red and green dye!
After trying to find a mini bundt pan, I realized it would be cheapest and easiest to just order a bundtlet from Nothing Bundt Cakes. After my sister-in-law, they make the best bundt cakes! Besides, when would I ever need to make one mini cake again?

Here's the whole table scape. Cake! Confetti! YAY!

I even made this cute little sign for the bathroom door after seeing a similar one on Pinterest.

One thing is for sure... this mama had fun at this party! And I'm going to scale back a tad for the second birthday party!
Any good party planning tips? What was your favorite party as a kid? I think I'd have to pick my American Girl Doll themed party!
Tuesday, April 2, 2013
Organizey Shopping: The Kitchen

I would love to go on a shopping spree for gear to organize and decorate every inch of my apartment! But since Mr. Budget says I can't right now, I'm going to start a series called Organizey Shopping. I will be window shopping room by room and share what I would love to buy and why.
First up is the kitchen!

1. I would love to get some canisters like these for the pantry. Not only do they look pretty, they would keep foods like cereal and crackers fresher while making it easy to see what needs to be added to the grocery list. I would definitely opt for square and rectangular ones over round ones because they for side by side snugly without wasted space. {source}
2. This cleanser rack can be installed a cabinet door adding extra storage space for sponges, cleaners, etc. {source}
3. This pull-out lid organizer takes advantage of vertical space and keeps lids easy to access. Currently our lids have a tendency to all fall out when you try to grab one. I do not enjoy the extra dishes to wash! {source}
4. These metal baskets are cute and useful! I would stick them in the pantry and use them to maximize vertical storage space while corralling smaller loose items like Lära Bars and packs of gum. {source}

5. I think it would be fun to use clear shelf liner in the kitchen drawers with pretty scrapbook paper underneath. I would choose a paper with a pattern that tiles well since drawers are typically not 12x12. Wrapping paper is another option. {source} & {source}
6. I love these spice jars! They have chalkboard labels and would look so cute and organized lined up on the kitchen counter or open shelving. {source}
7. We could definitely use something like these drawer organizers for our drawer of miscellaneous kitchen gadgets. It always becomes a jumbled mess because we have nothing to keep things in place. {source}
8. Extra pantry space that is easy to access! This one is a no brainer. {source}
Do you use any of these in your kitchen? What is your favorite tool to keeping your kitchen user-friendly?
Thursday, March 14, 2013
Loving Stylebook
I have discovered an amazing app for organizing your wardrobe and planning outfits. It's called Stylebook! I think it's only available on the iPhone right now, but that works for me!

It has a closet section where you add photos of all your clothes. Don't they look so cute all little and organized!?


I think this app is amazing for several reasons.
1. It should help me have more variety in my outfits and not wear the same shirt every Friday. Or even worse... wear the same outfit on Friday and the following Monday!
2. It helps me think of more ways to mix and match what I already have to create more outfits because it is easier to see your clothes in this format than smashed together in a closet. You can pick out a shirt and then scroll through and see all your cardigans to see what matches. I totally get stuck in the rut of wearing the same things together when I could do a lot more mixing and matching.
3. Do you ever buy a cute skirt and then realize none of your shirts match it? Or buy a turquoise shirt and realize once you get home that half your wardrobe is turquoise now? Guilty! But with this app, I can see how a potential purchase could work with my wardrobe before I buy it! It also makes it easy to see that I have way too many t-shirts but not enough blouses so that I know what to shop for.
4. It makes getting dressed in the morning so much faster! Which is great for a night owl like me who moves like molasses in the morning.
5. It tracks how often you wear each item. Which will make cleaning out my closet a piece of cake. I can just look in my app and get rid of anything I haven't worn in the past year. And less unnecessary stuff in the closet = less time spent managing it!
6. It also can track cost per wear if you put in the amount you paid for an item. Those $200 boots you splurged on don't seem so bad when you realize you have worn them so much that it's only $1 per wear. I think it will also help me to see which things I wear the most so that I know what types of clothes it makes sense to spend a little extra to get better quality on like my black pumps.
I have about 95% of my clothes photographed and added to my stylebook now and about 2% of my jewelry. I guess I need to get on that.
I am so happy to have an app to keep my wardrobe organized! You have no idea how happy this makes the organizer in me. So happy that while I was sick in bed with the flu and discovered it, I totally snuck out of bed to add the first few pictures of my clothes so I could start playing with it. Yes, it made me feel worse but it was worth it! Ha ha.
Note: This is not a sponsored post. I just really like this app!
It has a closet section where you add photos of all your clothes. Don't they look so cute all little and organized!?
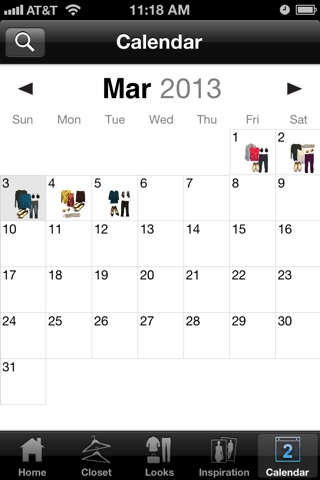
Then you can make them into outfits...
...and put them on your calendar!
I think this app is amazing for several reasons.
1. It should help me have more variety in my outfits and not wear the same shirt every Friday. Or even worse... wear the same outfit on Friday and the following Monday!
2. It helps me think of more ways to mix and match what I already have to create more outfits because it is easier to see your clothes in this format than smashed together in a closet. You can pick out a shirt and then scroll through and see all your cardigans to see what matches. I totally get stuck in the rut of wearing the same things together when I could do a lot more mixing and matching.
3. Do you ever buy a cute skirt and then realize none of your shirts match it? Or buy a turquoise shirt and realize once you get home that half your wardrobe is turquoise now? Guilty! But with this app, I can see how a potential purchase could work with my wardrobe before I buy it! It also makes it easy to see that I have way too many t-shirts but not enough blouses so that I know what to shop for.
4. It makes getting dressed in the morning so much faster! Which is great for a night owl like me who moves like molasses in the morning.
5. It tracks how often you wear each item. Which will make cleaning out my closet a piece of cake. I can just look in my app and get rid of anything I haven't worn in the past year. And less unnecessary stuff in the closet = less time spent managing it!
6. It also can track cost per wear if you put in the amount you paid for an item. Those $200 boots you splurged on don't seem so bad when you realize you have worn them so much that it's only $1 per wear. I think it will also help me to see which things I wear the most so that I know what types of clothes it makes sense to spend a little extra to get better quality on like my black pumps.
I have about 95% of my clothes photographed and added to my stylebook now and about 2% of my jewelry. I guess I need to get on that.
I am so happy to have an app to keep my wardrobe organized! You have no idea how happy this makes the organizer in me. So happy that while I was sick in bed with the flu and discovered it, I totally snuck out of bed to add the first few pictures of my clothes so I could start playing with it. Yes, it made me feel worse but it was worth it! Ha ha.
Note: This is not a sponsored post. I just really like this app!
Sunday, March 3, 2013
Organized Cleaing Schedule
Do you know what is always getting in the way of me having some fun by organizing?
Cleaning!
I like this photo because it looks like the bottles of cleaner are sad that they are stuck inside cleaning instead of playing outside.
Step 2
Make a list of the rooms in your house that need cleaning. Depending on how many, you might have a one or two week rotation. I came up with five and assigned them to Monday-Friday. Exclude weekends from this schedule!
Here's what my rotational list looks like:
Step 3
Make a list of the things that need to be cleaned in each room. Then, on the day of the week assigned to that room, spend no more than 30 minutes checking off one or two things on the list for that room. DO NOT clean the whole room! Just a manageable chunk! The goal is to clean everything on the list once a month. But again, don't stress if you don't! Just start the next month with the things you didn't get to the previous month.
As an example, here's what my bathroom list looks like:
Do you use a cleaning schedule? What works for you? Also, I'd love to know your favorite cleaning products. I personally was amazed when I removed a rust stain from my shower with Mr. Clean Magic Eraser and can't imagine dusting without my Swiffer Duster!
Cleaning!
I like this photo because it looks like the bottles of cleaner are sad that they are stuck inside cleaning instead of playing outside.
 |
| {source} |
One of my goals for 2013 is to come up with a way to stay on top of keeping things clean with minimal effort. My usual system looks something like this:
A) Spend an entire weekend exhausting myself by cleaning all the things!
B) Fail to clean all the things -or-
Clean all the things and then not clean ANYTHING for the next month because I earned it!
C) Repeat
This system has several problems.
A) It stinks to spend a weekend cleaning instead of relaxing
B) It's impossible to clean an entire home in 2 days while taking care of a toddler
C) Some things need to be cleaned more often than once a month!
I have also tried schedules of different things that I need to clean on different days of the week. But the problem with that was if I missed a day I felt like I had to double up the next day. And then I would quit.
I think I have finally come up with a system that works for me! I am so excited and can't wait to share it with you!
Step 1
Make a list of daily chores. These are things you try to do every day. Don't get too crazy with this list. It shouldn't take more than 30 minutes. Set a timer!
My daily list looks like this:
- wash and put away dishes
- wipe off table and high chair
- wipe kitchen counters
- pick up/put away
- wipe bathroom sink/counter
- scoop litterboxes (if needed)
- take out trash (if needed)
Step 2
Make a list of the rooms in your house that need cleaning. Depending on how many, you might have a one or two week rotation. I came up with five and assigned them to Monday-Friday. Exclude weekends from this schedule!
Here's what my rotational list looks like:
- Monday: Bathrooms
- Tuesday: Dining Room/Living Room
- Wednesday: Master Bedroom
- Thursday: Kitchen
- Friday: Guest Bedroom
Step 3
Make a list of the things that need to be cleaned in each room. Then, on the day of the week assigned to that room, spend no more than 30 minutes checking off one or two things on the list for that room. DO NOT clean the whole room! Just a manageable chunk! The goal is to clean everything on the list once a month. But again, don't stress if you don't! Just start the next month with the things you didn't get to the previous month.
As an example, here's what my bathroom list looks like:
- Clean tubs
- Clean mirrors
- Sweep and Swiffer Wet Jet
- Clean litterboxes and replace litter
- Clean toilets
- Dust vents and lights
- Dust baseboards
- Clean window and windowsill
- Wash shower curtains and liners
Do you use a cleaning schedule? What works for you? Also, I'd love to know your favorite cleaning products. I personally was amazed when I removed a rust stain from my shower with Mr. Clean Magic Eraser and can't imagine dusting without my Swiffer Duster!
Saturday, March 2, 2013
Miss Me?
Hi, everyone! I'm baaaaack! Happy Belated New Year!
And Happy Belated 1 Year Blog-aversary to Organizey Dreams! That's right... this little ol' blog started on January 2, 2012. Enjoy a virtual bundtini on me!

We have come a looooong way in organizing and de-cluttering since starting this blog. We had a successful garage sale and sold a lot of old books & movies to Half Price Books. But of course there is always more work to be done!
Since we no longer have to tackle entire rooms, my husband and I have decided to have Organizey Weekends! He's not too excited by the name, but the idea was his. Instead of me bugging him about organizing things all the time, once a month we will pick an area we need to work on and have a weekend focused on organizing it. I'm not sure what my posting schedule will look like, but I do plan on posting at least once a month now.
Some of the areas we would like to tackle include:
 |
| {source} |
And Happy Belated 1 Year Blog-aversary to Organizey Dreams! That's right... this little ol' blog started on January 2, 2012. Enjoy a virtual bundtini on me!

We have come a looooong way in organizing and de-cluttering since starting this blog. We had a successful garage sale and sold a lot of old books & movies to Half Price Books. But of course there is always more work to be done!
Since we no longer have to tackle entire rooms, my husband and I have decided to have Organizey Weekends! He's not too excited by the name, but the idea was his. Instead of me bugging him about organizing things all the time, once a month we will pick an area we need to work on and have a weekend focused on organizing it. I'm not sure what my posting schedule will look like, but I do plan on posting at least once a month now.
Some of the areas we would like to tackle include:
- desk
- guest closet (basically a 2nd storage unit at the moment)
- storage unit
- CDs (if you only knew how many my husband has!)
- toy storage
- master closet
Saturday, November 17, 2012
See ya later, alligator!
As much as I love organizing and blogging, I'm having trouble finding time to do both. My little one is now walking (almost running!) and exploring everything! I have still been a busy bee when it comes to organizing, but I am taking a break from blogging about it. I hope to return to it at some point after the holidays... in a while crocodile!
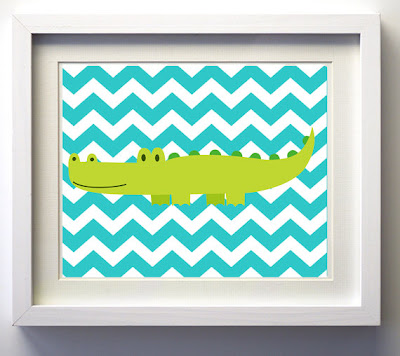 P.S. Alligator print image is from Etsy. You can buy one fromZeppiPrits!

Subscribe to:
Comments (Atom)