

Saturday, November 17, 2012
See ya later, alligator!
As much as I love organizing and blogging, I'm having trouble finding time to do both. My little one is now walking (almost running!) and exploring everything! I have still been a busy bee when it comes to organizing, but I am taking a break from blogging about it. I hope to return to it at some point after the holidays... in a while crocodile!
 P.S. Alligator print image is from Etsy. You can buy one fromZeppiPrits!
Saturday, September 15, 2012
Pictures, Pictures on the Wall
One project I had been wanting to tackle for a while is the art in our living room. Originally, we had a flower picture you can see in this post here. It was really too small to fill the space. For a Mother's Day and Father's Day gift, my parents gave us our framed family bluebonnet picture. I decided it would be the perfect centerpiece for a gallery wall.


Since my patterns weren't exact, I used a piece of printer paper to make precise guides for determining where to put the nails in the wall. I put the paper on the back of each frame and lined it up with a top corner. Then I marked a hole where the hanger on the back was. This part was super easy, no measuring required!


I repeated those steps until all the pictures I had were hung! I still need to find the white mattes I have somewhere to replace the maroon ones. I also need to buy three more 5" x 7" frames since I only have one. I am waiting to hang the one I do have in case I can't find the same one and need to buy all four to have them match.


I spent some time on Pinterest coming up with ideas of how to arrange a gallery wall that doesn't look too random. I decided using all black frames would help tie things together enough that I could use color pictures. I love the look of black and white photos in all white frames on a colored wall, but wanted to work with what I have.
To plan my layout, I gathered the frames I wanted to use and then roughly traced them on tissue paper. Then I took my tissue paper patterns and taped them on the wall with masking tape. Painter's tape would probably work even better, but the masking tape didn't damage the walls since it was so temporary. I moved things around until I came up with this arrangement. I love it because it is balanced but not too symmetrical.

Since my patterns weren't exact, I used a piece of printer paper to make precise guides for determining where to put the nails in the wall. I put the paper on the back of each frame and lined it up with a top corner. Then I marked a hole where the hanger on the back was. This part was super easy, no measuring required!

Then I lined the corner of my paper up with the corner of the tissue paper pattern and taped it to the wall in its place. I used a ruler to double check the space between frames to keep that consistent on both sides. After that all I had to do was add a nail where I had marked the hole.

I repeated those steps until all the pictures I had were hung! I still need to find the white mattes I have somewhere to replace the maroon ones. I also need to buy three more 5" x 7" frames since I only have one. I am waiting to hang the one I do have in case I can't find the same one and need to buy all four to have them match.

I am really happy with the progress I made on our gallery wall! There are no more pictures leaning on the book shelf and the awkward empty space above the couch is now filled with memories.
Have you ever hung a gallery wall? Do you have any advice for making it a quick and easy process?
Tuesday, September 4, 2012
Bathroom Bliss Part 2
After our son was born, we had our mom's helping with laundry/putting things away, and we were too tired to put things back where they belong our selves, so our linen closet became organized by the "stuff things where they fit" method. I basically took everything out so I could put it back in with a plan. I also edited out what we put back in. We got rid of some things like our rusty old shower caddy that we haven't used since we moved in 3 years ago and expired medicines. By the time I was done, I had a brown paper grocery bag overflowing with trash.
The top shelf has less frequently used items like beach towels, extra crib sheets, nail polish, and a basket of hair accessories.
Below that, we have burp cloths, my "second bathroom drawer", a small basket with extra razor blades, a basket of medicine, and a basket of travel sized toiletries. The basket I refer to as my "second bathroom drawer" is a basket with a handle that I pull out while I am getting ready and then put back in the closet. It prevents a lot of items from cluttering up the counter. It holds things like my hairbrush, contact solution, and glasses case.
The third shelf down has some drawers that used to be below the sink where you couldn't even open the bottom one. They hold nail clippers, first aid items, and make up. The basket to the right of them holds extra items from packages that come with more than one.

Then on the lower shelves we have towels, sheets, and cleaning supplies. I plan on putting a child proof door knob cover on this door once our son is opening doors on his own.
The sheets I have sorted in stacks by which bed they fit on. Towels are also sorted by size. I relocated the old towels we don't really use under the sink so that the ones we use fit in here. I still like to keep old towels around because they come in handy for cleaning up big messes.

The back of our bathroom door also needed a little help. We have these handy hooks from my college days, but too much stuff had accumulated there, including my Mary Kay travel bag I hadn't used since December. Now it holds just my winter and summer robes. I think the winter one was in the wash when I took this picture.

It was difficult to photograph under the sink, but it mainly holds less used items. I also tried to put baby safe items under there since it will be tricky to install child safety locks on all 4 cabinets due to the material they are made of and the fact that we are renters. So we have old towels and extra toilet paper under there, as well as our travel toiletry bags. There are no crazy chemicals or medicines for our son or cats to get into.
We have been doing a pretty good job of keeping our bathroom organized. Having things in places that make sense makes all the difference!
Do you have any tips for getting and/or keeping a bathroom organized? We would love to hear them!
Sunday, September 2, 2012
Bathroom Bliss Part 1
Back in May, we completely reorganized our bathroom!
May
Master bathroom
Guest bathroom
Storage unit
Yes, I realize it is September now... I guess it took me a while to recover, ha ha. Deciding to stay in our current apartment for another year also slowed down or momentum for getting rid of junk before moving. Now that the "it's too hot to move" heat of summer will be leaving soon, we are hoping to create a new de-cluttering/organizing schedule and get it done!
First, I'm going to share a couple of ways we re-purposed items from our bathroom set we got for our wedding. We have a beachy/ palm tree theme going on in there. This cute little umbrella toothbrush holder is great... only I have an electric toothbrush that doesn't fit in it and my husband doesn't like to leave his toothbrush sitting out. So, it's new job is makeup brush holder! I love how it keeps them handy and prevents excess makeup from building up in the drawer.

Our bathroom set also includes this cute little hammock soap dish... but we use liquid soap! Since my husband likes to remove his rings when he washes his hands, it became a ring hammock!

Making our bathroom more functional involved clearing off some of the items we had been storing on the counter, reorganizing our bathroom drawers, re-organizing all of the items under the sink and in the closet, getting rid of expired medicines and products, and putting away some of the stuff hanging on the back of the bathroom door. In other words, we did it all!
I had been wanting some kind of dividers to help our drawers stay in order, so I was excited when I found these plastic ones in the Dollar Spot at Target! My husband and I now each have one skinny one and one larger rectangle one. They are a huge help when it comes to keeping things in place, and I love the $2 price for all four. For my drawer, I mainly have makeup. I also store my toothpaste, floss, contact case, eye drops, and current favorite nail polishes in there.

The rest of my nail polishes and makeup were under the sink in boxes and not very easy to get to. I dug them all out and got rid of everything that was too old, dried up, or no longer my style. Then they were relocated to the linen closet for easier access!
Stay tuned for a post about what we did to get our closet and under the sink space organized coming soon.
Do you have any re-purposed items in your bathroom? Do you like things out where they are quick to grab or put away for a clutter-free space? Does your makeup collection still have old things like body glitter?!
May
Storage unit
Yes, I realize it is September now... I guess it took me a while to recover, ha ha. Deciding to stay in our current apartment for another year also slowed down or momentum for getting rid of junk before moving. Now that the "it's too hot to move" heat of summer will be leaving soon, we are hoping to create a new de-cluttering/organizing schedule and get it done!
First, I'm going to share a couple of ways we re-purposed items from our bathroom set we got for our wedding. We have a beachy/ palm tree theme going on in there. This cute little umbrella toothbrush holder is great... only I have an electric toothbrush that doesn't fit in it and my husband doesn't like to leave his toothbrush sitting out. So, it's new job is makeup brush holder! I love how it keeps them handy and prevents excess makeup from building up in the drawer.
Our bathroom set also includes this cute little hammock soap dish... but we use liquid soap! Since my husband likes to remove his rings when he washes his hands, it became a ring hammock!

Making our bathroom more functional involved clearing off some of the items we had been storing on the counter, reorganizing our bathroom drawers, re-organizing all of the items under the sink and in the closet, getting rid of expired medicines and products, and putting away some of the stuff hanging on the back of the bathroom door. In other words, we did it all!
I had been wanting some kind of dividers to help our drawers stay in order, so I was excited when I found these plastic ones in the Dollar Spot at Target! My husband and I now each have one skinny one and one larger rectangle one. They are a huge help when it comes to keeping things in place, and I love the $2 price for all four. For my drawer, I mainly have makeup. I also store my toothpaste, floss, contact case, eye drops, and current favorite nail polishes in there.

The rest of my nail polishes and makeup were under the sink in boxes and not very easy to get to. I dug them all out and got rid of everything that was too old, dried up, or no longer my style. Then they were relocated to the linen closet for easier access!
Stay tuned for a post about what we did to get our closet and under the sink space organized coming soon.
Do you have any re-purposed items in your bathroom? Do you like things out where they are quick to grab or put away for a clutter-free space? Does your makeup collection still have old things like body glitter?!
Sunday, July 8, 2012
Update and ideas
Since we decided to renew our lease one more year and our little one is becoming more mobile, our organizing/blogging pace has definitely slowed. We did tackle our master bathroom (post coming soon-ish) and make a little progress in the kitchen and guest bedroom during June.
Since our decision to renew our lease means we will have a 2-year old while still in this apartment (how is he almost one?!), we now have plans to do a major switch around to give our little dude his own room!
In the mean time, here are some of my favorite organization ideas I have come across recently.
1) A DIY shower caddy using a second shower curtain rod. I love that you can customize with how ever many baskets you need. You could also use a second rod like this for hanging pool towels or clothes to drip dry over the tub.
If you know where this photo came from, please share! I found it on Pinterest with a dead link. :(

2) A Thousand Words blog, has a great system for organizing photos.

3) 2 Little Hooligans has this clever idea for corralling gift wrapping supplies using a stool.

Do you have any great organization ideas you have discovered recently?
Wednesday, May 16, 2012
Guest Bath...Check!
Another room is completed!
May
Master bathroom
Guest bathroom
Storage unit
I decided to put our guest bedroom/closet on hold for now. It's crazy how much stuff we have to go through in that one room and I was losing momentum and becoming overwhelmed.
One of the main things I tackled in the guest bathroom was organizing the cabinet. Since I give our son baths in this room now, one of my goals was to make room for his towels, washcloths, and bath toys in here. It started off looking like this.

By getting rid of some things and relocating some things, I was able to clear off the top shelf completely! Then I gathered all of the baby wash cloths and towels from our overflowing linen closet and moved them in here.

I also gathered up all of the bath toys and put them in the bucket which just fit on the top shelf. The bottom shelf holds baby toiletries, lint rollers, and a few extra supplies for guests. This kid has enough shampoo/body wash to last until he's 10!
Mr. Babycito only uses a couple of bath toys at a time right now since we put his little tub inside the big tub. In between baths, his current bath toys hang out on the soap dish to dry.

And his tub hangs over the big tub to dry like this.

I re-purposed the basket that held bubbles at our wedding as an extra toilet paper holder. This helped free up some of the space in the cabinet. I love that the blue bow already matched the shower curtain and clock!

The drawer to the left of the sink is mostly empty. The one to the right holds some extra travel bags and a few things my mom leaves here so there is less to pack when she visits her grand baby. Once you have kids, your parents no longer visit you. It's all about the grand kids, ha ha.
I also organized under the sink. I threw away a very leaky silver polish and cleaned up its mess. Then I mainly just arranged things better. On the left we have the litter box lids that we don't use currently. On the right there's an extra scale, watering cans. And a trash can. I actually switched the too big round trash can under this sink with the too small square trash can in our master bathroom.
I am loving the results! Now it's time to tackle the master bathroom! Do you store a lot in your guest bathroom or is it more for guests? How do you store your extra toilet paper?
May
Master bathroom
Storage unit
I decided to put our guest bedroom/closet on hold for now. It's crazy how much stuff we have to go through in that one room and I was losing momentum and becoming overwhelmed.
One of the main things I tackled in the guest bathroom was organizing the cabinet. Since I give our son baths in this room now, one of my goals was to make room for his towels, washcloths, and bath toys in here. It started off looking like this.

By getting rid of some things and relocating some things, I was able to clear off the top shelf completely! Then I gathered all of the baby wash cloths and towels from our overflowing linen closet and moved them in here.

I also gathered up all of the bath toys and put them in the bucket which just fit on the top shelf. The bottom shelf holds baby toiletries, lint rollers, and a few extra supplies for guests. This kid has enough shampoo/body wash to last until he's 10!
Mr. Babycito only uses a couple of bath toys at a time right now since we put his little tub inside the big tub. In between baths, his current bath toys hang out on the soap dish to dry.

And his tub hangs over the big tub to dry like this.

I re-purposed the basket that held bubbles at our wedding as an extra toilet paper holder. This helped free up some of the space in the cabinet. I love that the blue bow already matched the shower curtain and clock!

The drawer to the left of the sink is mostly empty. The one to the right holds some extra travel bags and a few things my mom leaves here so there is less to pack when she visits her grand baby. Once you have kids, your parents no longer visit you. It's all about the grand kids, ha ha.
I also organized under the sink. I threw away a very leaky silver polish and cleaned up its mess. Then I mainly just arranged things better. On the left we have the litter box lids that we don't use currently. On the right there's an extra scale, watering cans. And a trash can. I actually switched the too big round trash can under this sink with the too small square trash can in our master bathroom.
I am loving the results! Now it's time to tackle the master bathroom! Do you store a lot in your guest bathroom or is it more for guests? How do you store your extra toilet paper?
Sunday, May 13, 2012
Sweeter dreams!
As an early 5 year anniversary present to each other, my husband and I decided we couldn't wait any longer to get a new mattress! Isn't she pretty?

We bought our old mattress at The Dump. Yes, that's the name of the store, but it is actually quite fitting. They advertise highly discounted prices because they buy from businesses that are closing. In reality, they sell cheap, defective junk. I have a friend who had a similar experience. The mattress was okay at first. But when it came time to flip it top to bottom like the instructions said, we discovered the bottom wasn't even a finished surface. It was definitely not the same bed we tried in the store. Unfortunately, at that point there was nothing we could do.
After sleeping on it for 5 years, it looked like this...


We put a yardstick across it to really show how bad it was. It was sunk in 3-5 inches on each side, and the middle had a hump higher than the edges. The sinking had started before it was even a year old. And we were both having trouble sleeping through the night and/or waking up sore.
We decided to start our shopping off by learning our sleep numbers so we would know what we were looking for. They actually were closer together than we expected. With 100 being hard and 5 being soft, I am a 30, and my husband is a 40. But we aren't fans of how comfy (or pricy) Sleep Number beds are.
So, off to Sleep Experts we went! My full sized bed I bought in college that is now our guest bed is a Simmons from there. And it's a great bed! I call it "the cloud bed" because it is THAT comfy.
Our new king sized mattress we picked out is also a Simmons Beautyrest. It's sooooooo much better! And flat! The sheets stay on better too. Plus, it comes with a one year love your mattress guarantee! We even saved some money buy getting a mis-matched box spring.

We went back the next day and got new pillows too. Our old ones were too flat for our new bed. I guess our old one kind of had built in pillows after becoming so lumpy and deformed. Of course, everything got brand new allergy covers to protect it and keep us healthy. After sleeping on it for two weeks, we are definitely having sweeter dreams now!
Any amazing mattress recommendations? Do you prefer soft or hard? Memory foam or pillow top? Spill the beans in the comments.
Tuesday, April 24, 2012
Regift(bag)ing
I love saving gift bags to reuse them. Those guys are expensive for being nothing but a little paper and ribbon! The only problem was that my gift bag collection was taking over our guest closet and it was getting hard to quickly find what I needed. Plus, some of them were getting scrunched. So, as I grabbed a bag to wrap a baby gift, I decided to organize them all!
First, I sorted all my gift bags and threw away all of the crunched up old ones. The next step was deciding what to store them in. I didn't want to spend any money on it right now, so I went into my laundry room to grab a couple of paper grocery bags. Instead, I discovered a couple of white bags from Loft! I got really excited because they are much prettier looking! Everything fit perfectly in the bags, but I was one short. Luckily, I found a Bed Bath and Beyond gift bag that was similar. Here are the sorted and filled up bags.

I used a sharpie to label what was in each one. One holds tissue paper, gift boxes, ribbon, bows, and gift tags. The next one holds gift bags for holidays, weddings, and baby showers. The last one holds my non-specific gift bags. I labeled it miscellaneous.

The final step was putting them up on the shelf and hoping they fit... I had just enough space for them! I love it when things work out so easily like this! I hope the rest of the closet is this easy to organize (yeah right)!

As for how I store rolls of wrapping paper, I don't have very many so they are in the flimsy clear plastic box that a 4 pack I bought at Target one year came in. It stands up vertically on the floor of the closet.
How do you store your gift wrapping supplies? Do you like to reuse gift bags and tissue paper or buy new?
Wednesday, April 11, 2012
Party planning
In just four short months, my baby will be turning one! I decided to start planning his party early because I LOVE planning kids parties and I don't want to be crazy busy planning it last minute. So, I'm trying to get organized now.
I started off by making a kids party ideas board on pinterest. If you haven't signed up on pinterest yet, I highly recommend it! Here are some of the fun ideas I found:

1) Ducky Punch from TidyMom.net- this would be cute for a baby shower
2) Goldfish Party from Cake.- I love fishes cause they're so delicious! Buckets of Goldfish crackers would also be fun for a pool party or beach themed party.
3) The Very Hungry Caterpillar Food from Project Project- Gotta love a theme that comes with a menu! And The very Hungry Caterpillar is one of my favorite kid books.
4) Lego Cake from LikeCool.com- What little boy doesn't love Legos?!
5) Sea Turtle Cupcakes from theBERRY.com- This would be perfect for a Finding Nemo Party!
6) Monkey Cupcakes from Squidoo.com- These would be cute for a jungle themed party!
I think I am going to go with a Very Hungry Caterpillar theme for my baby's 1st birthday! I have tons of great ideas.
The next step was breaking out a notebook to jot down my favorite ideas that I want to incorporate into his party. To do this, I made a separate page for each of the following categories:

Since I will be making decorations, favors, and cakes plus designing my own invitations and other items that I will need to get printed, getting organized now is vital!
The next step is making my party planning schedule!
Do you love party planning? What is your favorite theme for a kid party?
I started off by making a kids party ideas board on pinterest. If you haven't signed up on pinterest yet, I highly recommend it! Here are some of the fun ideas I found:

1) Ducky Punch from TidyMom.net- this would be cute for a baby shower
2) Goldfish Party from Cake.- I love fishes cause they're so delicious! Buckets of Goldfish crackers would also be fun for a pool party or beach themed party.
3) The Very Hungry Caterpillar Food from Project Project- Gotta love a theme that comes with a menu! And The very Hungry Caterpillar is one of my favorite kid books.
4) Lego Cake from LikeCool.com- What little boy doesn't love Legos?!
5) Sea Turtle Cupcakes from theBERRY.com- This would be perfect for a Finding Nemo Party!
6) Monkey Cupcakes from Squidoo.com- These would be cute for a jungle themed party!
I think I am going to go with a Very Hungry Caterpillar theme for my baby's 1st birthday! I have tons of great ideas.
The next step was breaking out a notebook to jot down my favorite ideas that I want to incorporate into his party. To do this, I made a separate page for each of the following categories:
- Decorations
- Cake
- Food & Drinks
- Serving ware
- Activities
- Party Favors
- Invitations

Since I will be making decorations, favors, and cakes plus designing my own invitations and other items that I will need to get printed, getting organized now is vital!
The next step is making my party planning schedule!
Do you love party planning? What is your favorite theme for a kid party?
Saturday, April 7, 2012
Bottled up
Our bottles moved up! For a while now we have had a row of wine bottles across the top of our kitchen cabinets, as you can see in the photo below.

Then there was a gap, followed by a group of vases. It was not very cohesive. And who needs this many vases?!

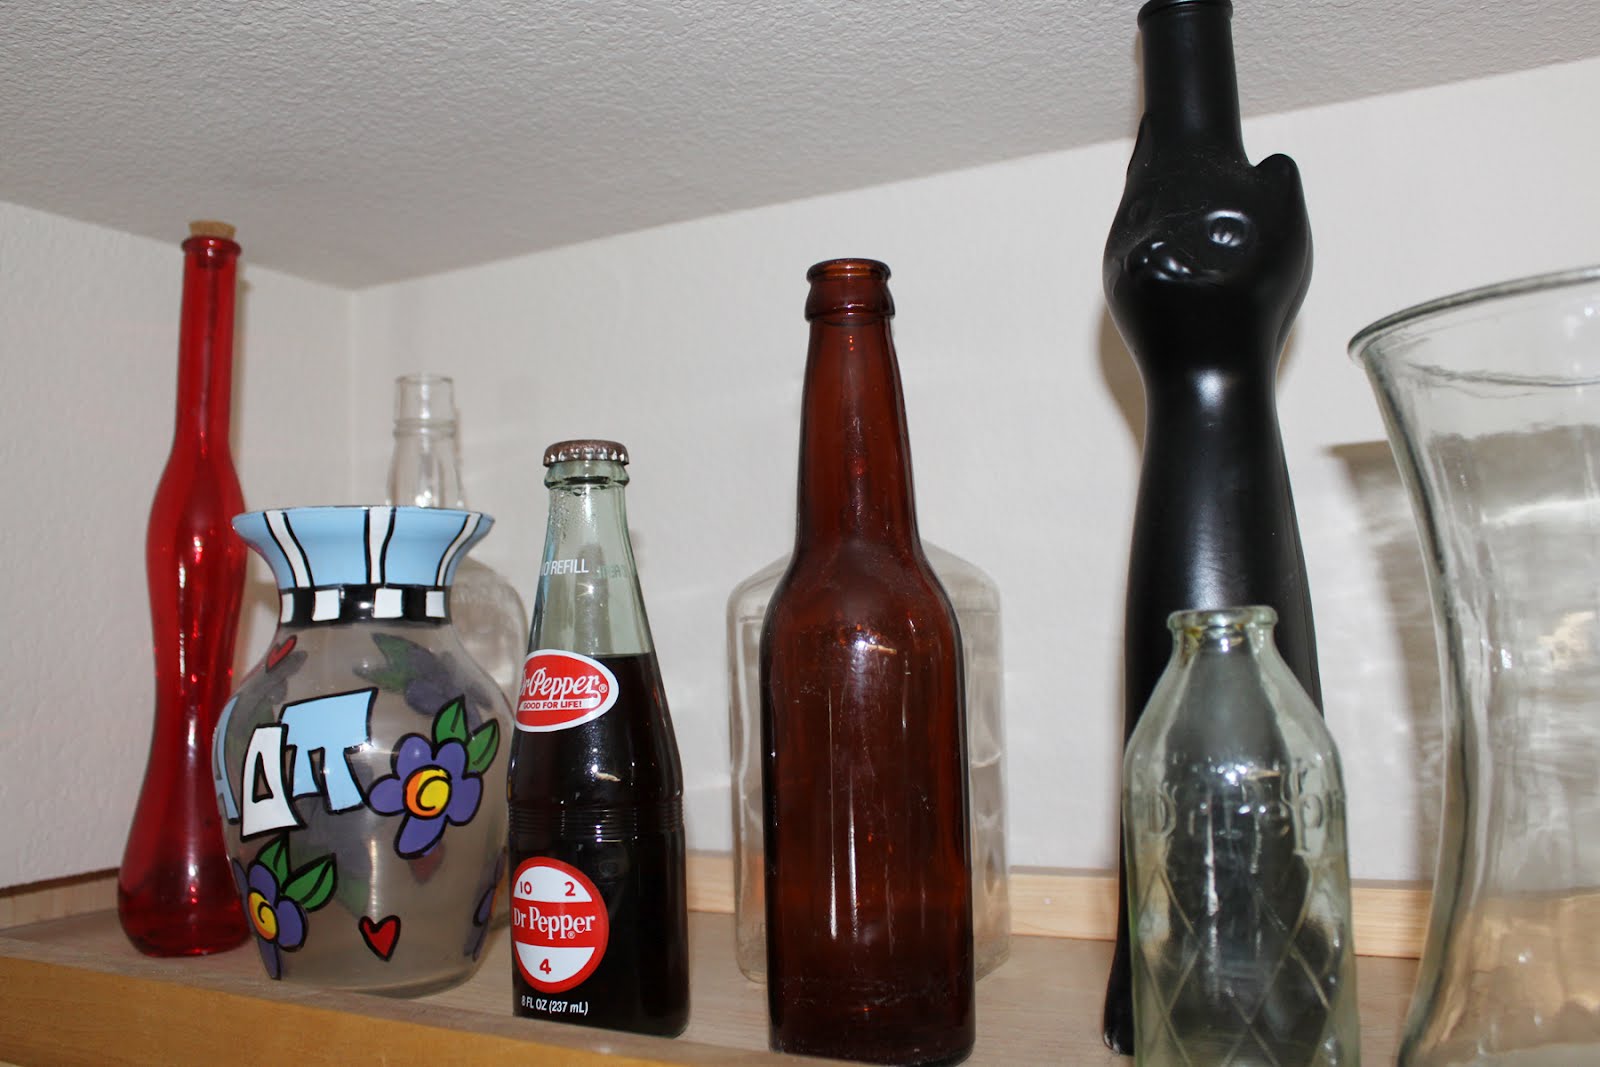
We also have had other bottles on top of one of our bookshelves including some antique Dr. Pepper bottles.

I decided it was finally time to make these vases and bottles more cohesive! I got rid of some of the vases, only keeping my three favorites. I also got rid of some of the less pretty wine bottles. Then I gathered the remaining bottles and vases to arrange them all together. I started by putting the taller bottles in the back, and filling in with smaller ones in the front. I also tried to spread out color and clear ones to make an attractive arrangement. Here's the result!

Here are a few close ups. Yes, I was standing on a chair to take these pics.


They look so much prettier than they used to. I think it would look even better if eventually I limit the color palette of our bottle collection. Maybe just clear, blues, and greens?
Do you save old wine bottles? I have been know to buy bottle of wine just for the label design. What kind of ordinary objects do you use to decorate with?

Then there was a gap, followed by a group of vases. It was not very cohesive. And who needs this many vases?!

We also have had other bottles on top of one of our bookshelves including some antique Dr. Pepper bottles.

I decided it was finally time to make these vases and bottles more cohesive! I got rid of some of the vases, only keeping my three favorites. I also got rid of some of the less pretty wine bottles. Then I gathered the remaining bottles and vases to arrange them all together. I started by putting the taller bottles in the back, and filling in with smaller ones in the front. I also tried to spread out color and clear ones to make an attractive arrangement. Here's the result!

Here are a few close ups. Yes, I was standing on a chair to take these pics.


They look so much prettier than they used to. I think it would look even better if eventually I limit the color palette of our bottle collection. Maybe just clear, blues, and greens?
Do you save old wine bottles? I have been know to buy bottle of wine just for the label design. What kind of ordinary objects do you use to decorate with?
Feeling box-y
I'm back! We have been busy organizing papers in the guest bedroom which doesn't make for very exciting posts and then our computer was acting up for most of this week. After EIGHT phone calls with Apple Care and an erase/restore, my husband has it up and running again! Our Time Capsule to back up files was worth every penny!
I have been searching for the perfect storage boxes to go on top of our bookshelves in the living room for several months now, and I finally found them! They needed to be pretty since they would be out in the open and fit in the space while adding as much space as possible. I also wanted lids to prevent layers of dust from coating everything inside.
Thanks to the Container Store, I now own six of these beauties, also known as Square Havana Storage Boxes!

They measure 12-1/4" sq. x 9-1/2" h, making them the perfect size for my bookshelves! At $19.99 each, they were a bit of a splurge for me. The $45 I had in gift cards definitely helped. Plus, compared to all of the other options I found, they were actually on the less expensive side.

Here are what the shelves looked like before my gorgeous boxes came home with me. The photo albums have relocated to our master closet, the legos are on are bedroom bookcase, and the bottles are now in the kitchen (post on that coming soon!)

Here are the bookshelves now! They look so much less cluttered on top but we can actually store more! It's a win-win! What are we storing in our new boxes? One holds instruction manuals (this freed up TONS of space in the file drawers), my husband and I each have one for random odds and ends, one is for little decorative items that aren't currently being used, and two are still empty for now. I decided to get two gray instead of all black because a) my Container Store only had 5 black and I needed 6 and b) since the shelves are black too the gray breaks things up and adds interest. The black and gray also go with my couch pillows. The tan color they come in also matches my pillows, but I thought black and tan would have a little too much contrast.

You may also notice I have some picture frames leaning in front of books. I did that temporarily to get them out of the way until hang them, but I actually like how they hide some books and make things less busy looking. I will probably make a photo wall over the futon at some point, but for now they look good here.
What is your favorite organization-related splurge? Do you use pretty storage boxes? I am totally in love with mine!
Monday, March 19, 2012
The power of sticking with organization
Today I organized our batteries and tape! These are a couple of items in our guest bedroom/office that definitely needed to be organized. They were both in flimsy shoeboxes that were falling apart. The tape was even sticking to the shoebox it was in.
While we were at The Container Store yesterday — I LOVE that place — we found this battery organization box for $5.99. It holds 12 AAA, 12 AA, 6 C, and 4 D batteries.

At first, I thought that was silly because it would be annoying if you had 20 AA or 8 D batteries and they didn't all fit. Then I realized we rarely have more batteries than what it holds. Plus, it keeps them in place and is compact. A quick glance tells me I need to buy some AA batteries. I was even able to tuck some watch batteries in the skinny space that makes an L shape around the C batteries.

For our tape, I just grabbed this empty Sterilite container I had lying around. It holds duct tape, packing tape, and electrical tape. We have two rolls of each, probably because we couldn't find the tape and bought more. I'm excited about no more tape sticking to a falling apart box!

These two boxes will probably stay on the shelf on the right side of our desk. I'll add a pic once the rest of the shelf is organized. Baby steps!
How do you keep your tape and batteries organized and easily accessible? Do you share my love of The Container Store?
Saturday, March 17, 2012
Paper purging prep
Papers. We all have them. We all know there are some that are important and need to be kept. But organizing them and keeping them straight takes some work!
I haven't been able to file papers for several months because my file drawers are over stuffed. Before running out to buy another file cabinet or file box I don't have room for I started to wonder if I really needed to keep 10 years worth of cell phone bills, 13 years worth of pay stubs, and many other papers. I didn't even know exactly why I was saving all these things! So, I did some research and discovered I have lots off papers I can now shred!
I haven't been able to file papers for several months because my file drawers are over stuffed. Before running out to buy another file cabinet or file box I don't have room for I started to wonder if I really needed to keep 10 years worth of cell phone bills, 13 years worth of pay stubs, and many other papers. I didn't even know exactly why I was saving all these things! So, I did some research and discovered I have lots off papers I can now shred!

Here's what I learned:
- Bank deposit slips & statements should be kept for 6 years.
- Current contracts & leases should be kept for the life of contract + 10 years.
- Insurance records should be kept for the length of plan + 10 years.
- Legal correspondence, including marriage & birth certificates, should be kept forever.
- Paid bills should be kept 1 year. The exception is bills for big purchases including cars, furniture, and computers so you have proof of value if you need to file an insurance claim.
- Pay check stubs should be kept 1 year and tossed once they match up with your W2.
- Credit card receipts should be kept 1 month and then tossed if they match your monthly statement.
- Retirement & savings plan quarterly statements should be kept for 1 year. Keep annual statements until you retire or close your account.
- Tax returns & supporting documents should be kept for 7 years.
I'll follow these guidelines pretty closely, but with a couple of exceptions. I will probably save receipts for 3 months just in case since some things have 90 day return policies. I also plan to save my first and last pay check stub from each job I've had so I have a record of dates I worked there as well as starting and final salary.
I'm not looking forward to going through all our papers, but I am excited about the results we will have!
Do you save too many papers, not enough, or just what you need? Do you have any tips on what papers are important to keep or ways to organize them?
Thursday, March 15, 2012
Blissful bedroom
It took a couple of weeks longer than originally planned, but our February checklist is complete! We actually tweaked our schedule a little after realizing how intense the bedroom/closet organization is since those areas contain the most stuff. Check it out here or by clicking the plan tab above. Being flexible really helps when trying to complete a huge project like organizing your entire home without being too stressed by it.
Master bedroomMaster closet
To finish organizing our bedroom I finally rehung my painting so it is centered over our bed. It used to be centered until we added the changing table to the right and shifted everything else left. Rehanging the painting took 5 minutes and made a huge difference! I also made the bed, which always makes a bedroom look ten times better.

Before I could make the bed, I had to tackle the wrinkled bed skirt. I washed and ironed it. Then, I put it on the bed before it had a chance to re-wrinkle. Last year I tried the same thing, but didn't get it put back on fast enough so the ironing was a waste.
I read somewhere recently that you can help keep a bed skirt in place by using bed skirt tacks to attach it to the box spring. While I was googling where to buy bed skirt tacks, I found a list of several ways to keep a bed skirt in place which included using safety pins. I decided to give that method a try since I already had some, making it FREE! I placed one on each corner and one in the middle of each side. So far it is working like a charm.

To finish off the bedroom, I mainly just had to put some things away, dust everything including the baseboards and door frames, and vacuum. It is amazing how much cleaner a room looks with clean carpet and baseboards. We had a couple of piles of "stuff" we went through. Most of wound up neatly put away in the closet or in the trash. All of the papers were moved to the guest bedroom where they belong. However, they aren't filed away yet because our files are full which is making our paperwork out of control. That's the next projected to tackle.
Now, on to the after pictures of our clean and organized bedroom. It is so relaxing to be in there now! I'm going to let you in on a storage secret. Since we are in an apartment and will obviously move again at some point, we saved our moving boxes from the last move. A lot of them are under this bed and the bed in our guest room. It keeps them out of the way and prevents our kitties from hiding under the beds!

Our bookshelves and changing table are staying nice and tidy. I even removed a few more things from the shelves. Also, our little one is long enough now that we moved his diapers below the top of the changing table.

Here's the baby's side of the room. The chest of drawers is also staying nice and tidy. The white thing on the crib is a cat net to keep kitties out. It also will keep Mr. Babycito in when he starts pulling up. It's not the prettiest thing, but it's very functional. And what little boy doesn't enjoy sleeping in a tent?! Since you can't use bumpers with a cat net, I decided to use the bumpers as a bed skirt. Once we make room in the guest bedroom, the glider is going to move in there. It doesn't get used very much where it is now that middle of the night feedings are a thing of the past. In it's place, we are going to put our new pretty hamper! I've still been using my pop up one from college and my husband uses a laundry basket. So, I'm very excited about this change!

Here are my favorite details from our beautiful bedroom.

1. Colorful boxes on my bedside table
2. A painting I made in college
2. My jewelry tray
4. Mr. Babycito's initial from one of my baby showers. It's hung over two small nails.
5. Flowers from my other baby shower and a teddy bear which disguises the baby monitor.
Next up on the schedule is:
March 15 – April
Guest bedroom
Guest closet
I'm pretty sure it will be the most challenging zone, as well as the most rewarding. I'll feel great if we have it finished by the end of April because it is going to be a lot of work.
February – March 15

Before I could make the bed, I had to tackle the wrinkled bed skirt. I washed and ironed it. Then, I put it on the bed before it had a chance to re-wrinkle. Last year I tried the same thing, but didn't get it put back on fast enough so the ironing was a waste.
I read somewhere recently that you can help keep a bed skirt in place by using bed skirt tacks to attach it to the box spring. While I was googling where to buy bed skirt tacks, I found a list of several ways to keep a bed skirt in place which included using safety pins. I decided to give that method a try since I already had some, making it FREE! I placed one on each corner and one in the middle of each side. So far it is working like a charm.

To finish off the bedroom, I mainly just had to put some things away, dust everything including the baseboards and door frames, and vacuum. It is amazing how much cleaner a room looks with clean carpet and baseboards. We had a couple of piles of "stuff" we went through. Most of wound up neatly put away in the closet or in the trash. All of the papers were moved to the guest bedroom where they belong. However, they aren't filed away yet because our files are full which is making our paperwork out of control. That's the next projected to tackle.
Now, on to the after pictures of our clean and organized bedroom. It is so relaxing to be in there now! I'm going to let you in on a storage secret. Since we are in an apartment and will obviously move again at some point, we saved our moving boxes from the last move. A lot of them are under this bed and the bed in our guest room. It keeps them out of the way and prevents our kitties from hiding under the beds!

Our bookshelves and changing table are staying nice and tidy. I even removed a few more things from the shelves. Also, our little one is long enough now that we moved his diapers below the top of the changing table.

Here's the baby's side of the room. The chest of drawers is also staying nice and tidy. The white thing on the crib is a cat net to keep kitties out. It also will keep Mr. Babycito in when he starts pulling up. It's not the prettiest thing, but it's very functional. And what little boy doesn't enjoy sleeping in a tent?! Since you can't use bumpers with a cat net, I decided to use the bumpers as a bed skirt. Once we make room in the guest bedroom, the glider is going to move in there. It doesn't get used very much where it is now that middle of the night feedings are a thing of the past. In it's place, we are going to put our new pretty hamper! I've still been using my pop up one from college and my husband uses a laundry basket. So, I'm very excited about this change!

Here are my favorite details from our beautiful bedroom.

1. Colorful boxes on my bedside table
2. A painting I made in college
2. My jewelry tray
4. Mr. Babycito's initial from one of my baby showers. It's hung over two small nails.
5. Flowers from my other baby shower and a teddy bear which disguises the baby monitor.
Next up on the schedule is:
March 15 – April
Guest bedroom
Guest closet
I'm pretty sure it will be the most challenging zone, as well as the most rewarding. I'll feel great if we have it finished by the end of April because it is going to be a lot of work.
Are you doing any spring cleaning? Do clean and organized spaces get you all excited too? I am absolutely loving our bedroom!
Subscribe to:
Posts (Atom)